Step By Step Guide to Automate Publishing from Notion to Webflow CMS
Introduction
In the fast-paced digital landscape, efficiency and automation are key. Content creators are constantly looking for ways to streamline the production process. Enter SyncFlow, a cutting-edge tool designed to automate the synchronization between Notion and Webflow CMS. This integration not only saves time but also minimizes errors, ensuring seamless content publication.
Why Automate with SyncFlow?
Using Notion as a content creation platform offers unparalleled flexibility in writing and structuring content. However, manually transferring this content to Webflow CMS can be cumbersome. With SyncFlow, this process is automated, allowing for a smoother workflow and enabling you to focus on what truly matters—creating engaging content.
Key Benefits:
- Auto-Sync: Changes made in Notion are reflected in Webflow CMS in real time.
- Versatility in Field Types: Handles complex data types, making content management more versatile.
- Customizability: Offers inline or class-based styling to align with your Webflow design needs.
Getting Started with SyncFlow
The process to set up SyncFlow is straightforward and can be broken down into simple steps. Let’s dive into the essentials:
Step 1: Visit the SyncFlow Website
Navigate over to the SyncFlow Website and click on 'Get Started'. Here, you’ll grant the necessary permissions and access to both your Webflow and Notion accounts.
Step 2: Set Up Your Account
- Sign Up: Create an account on SyncFlow if you haven't already. Existing users can simply log in.
- Connect to Webflow: Within the Webflow Designer, launch the SyncFlow app to begin the integration.
Step 3: Connect Notion to Webflow
In SyncFlow, follow these steps:
- Click on 'Connect Notion' and choose the specific page or folder for synchronization.
- Create a new database to initiate the sync with Webflow or select an existing one.
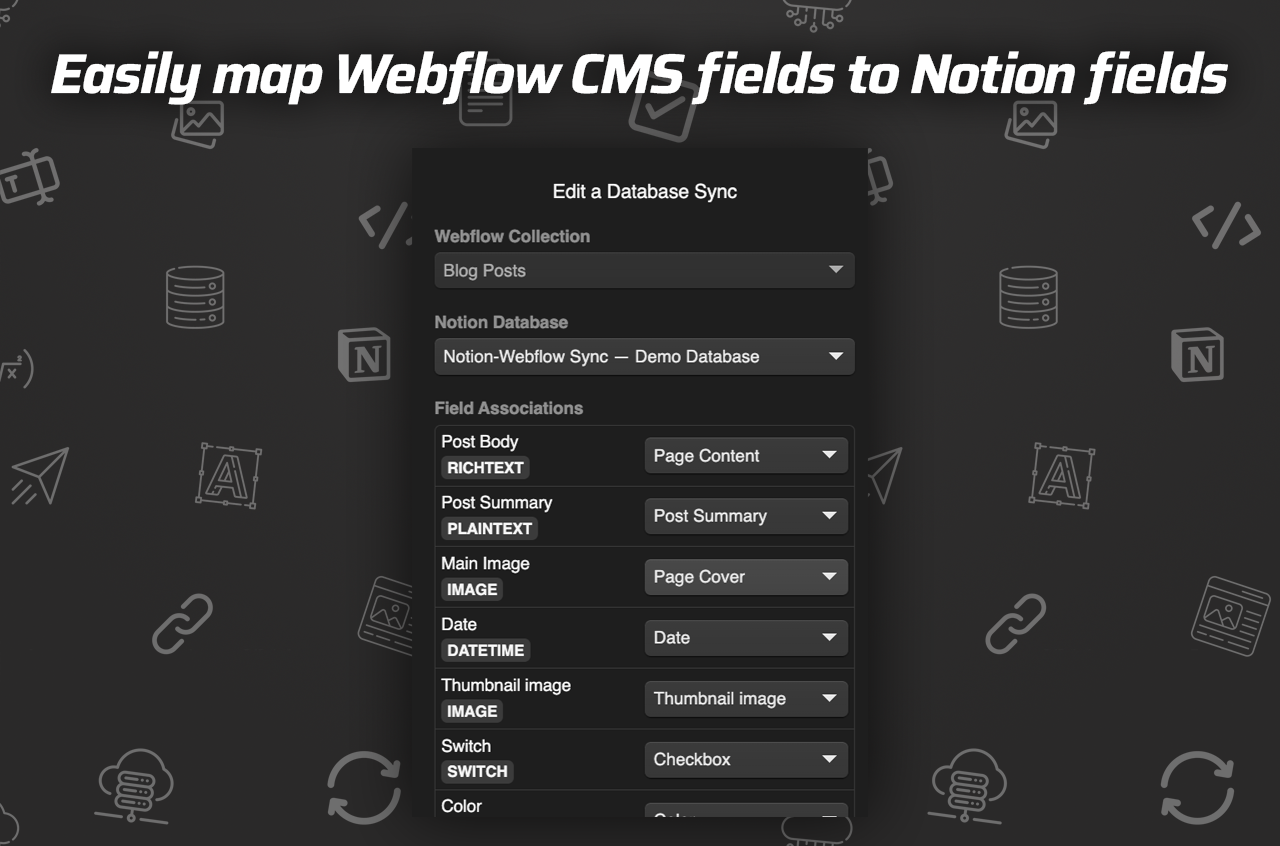
Step 4: Creating a Sync Task
- Select Your Webflow Collection: Choose the Webflow collection to sync with your Notion database.
- Setup Database: Allow the setup of fields whether existing or new. SyncFlow will handle the establishment of these connections.
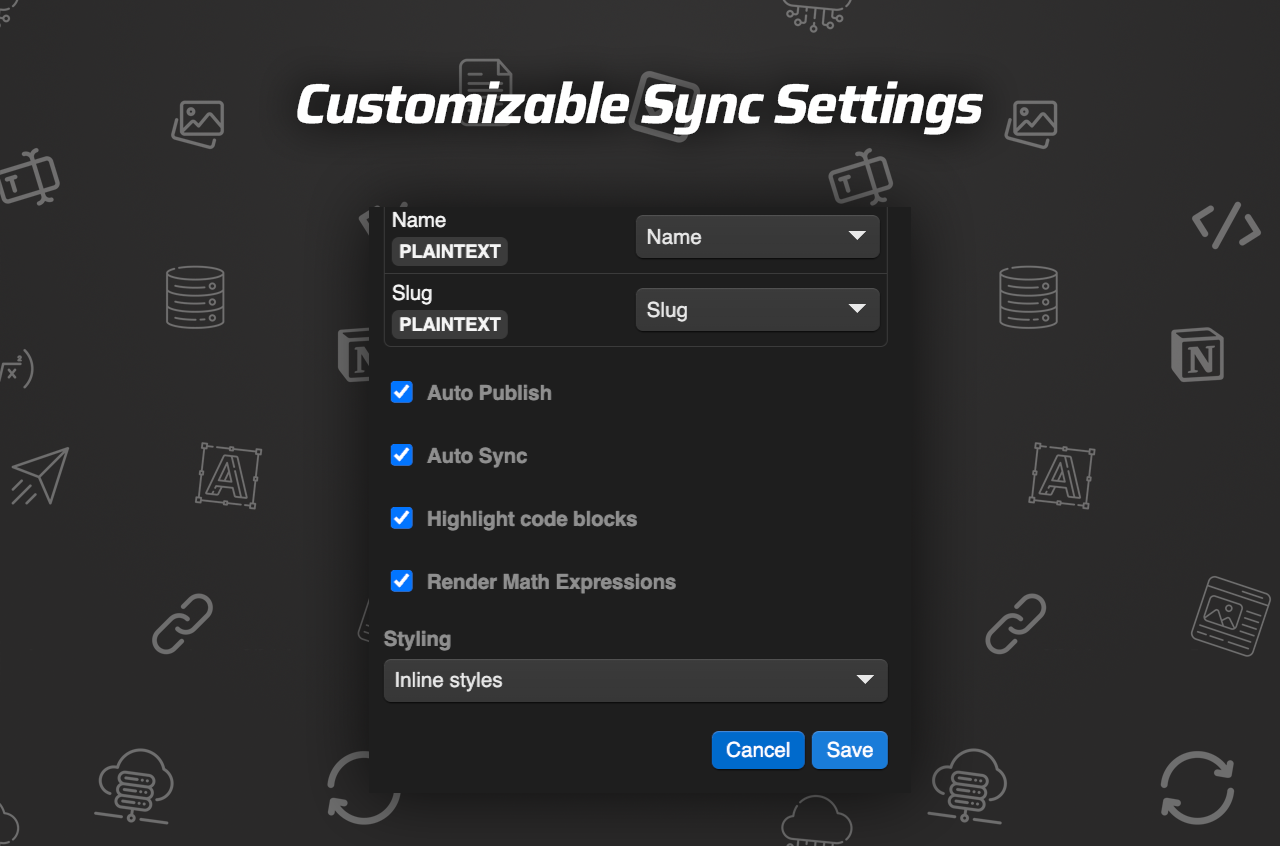
Step 5: Customize and Synchronize
- Adjust settings like 'Auto-Publish' or 'Auto-Sync' according to your needs.
- Enable features such as code block highlights or TeX support for mathematical formulas.
- Choose styling: Use 'Inline Styles' for direct import aesthetics or 'Use Classes' for advanced custom styling.
Step 6: Save and Verify
- Save Your Settings: Ensure all configurations are saved for synchronization.
- Verify the Sync: Add a new entry in your Notion database and check its status in Webflow CMS.
- Full Resync Option: This feature is available for matching entire Webflow collections with Notion databases.
Watch and Learn
For a more visual guide, check out these tutorials:
Conclusion
Automating your Notion to Webflow synchronization process not only saves time but enhances productivity. With SyncFlow's user-friendly setup and advanced features, publishing content is now more efficient and reliable.
Ready to take your content publishing to the next level? Visit the SyncFlow website today and start your seamless integration between Notion and Webflow CMS.
Additional Resources
If you're interested in learning more about how SyncFlow can revolutionize your content management, explore the SyncFlow for more details on pricing and other features.