How To Shoot High Conversion Lifestyle Product Photos for Shopify Stores
When shoppers land on your product page, their brain makes a snap decision: 'Can I picture this in my life?' Lifestyle product photos bridge that gap. They show scale, context, and emotion — the combination that boosts add-to-cart rates and reduces returns. In this guide, you’ll learn a proven workflow to shoot conversion-focused lifestyle images for Shopify, plus a shortcut to scale your visuals with AI.
Why lifestyle photos convert on Shopify
- Context reduces uncertainty: Seeing products in realistic settings answers 'How big is it?' and 'How will it look at home/on me?'
- Emotion sells: Warm light, tactile textures, and human touch signal quality and trust.
- Multi-channel fit: Lifestyle crops adapt better to ads, emails, and social than sterile pack shots.
If your current catalog is inconsistent or lacks lifestyle context, you can fix that quickly with AI. Supra AI Photo Studio for Shopify transforms plain images into studio-grade lifestyle visuals, model try-ons, and even UGC-style videos — without extra gear.
What makes a high-converting lifestyle image
- Clear subject hierarchy: The product is unmistakably the hero; props support, not distract.
- Natural light or believable lighting: Soft, directional light creates depth and realism.
- Real-world context: Surfaces, hands, outfits, and environments that match the buyer’s life.
- Composition for CRO: Enough negative space for overlays, badges, and ad copy.
- Consistency across the catalog: Cohesive angles, color palette, and backgrounds.
Gear-light setup that works
- Camera: Modern smartphones or any DSLR/mirrorless will do. Prioritize stability and light.
- Stabilization: Tripod or phone clamp. Stability improves sharpness and consistency.
- Light: North-facing window + sheer curtain; add a reflector (white foam board) opposite the window.
- Backgrounds: Neutral options like linen, unfinished wood, plaster boards, or seamless paper.
- Small kit: Microfiber cloth, gaffer tape, museum putty, lint roller, and a collapsible 5-in-1 reflector.
Plan your shoot like a marketer
- Define the use case and persona
- Who is buying and where will they use it? Kitchen counter, office desk, gym bag, city street?
- Create a mini mood board
- Collect 6–9 references with consistent light, color palette, and angles. Use this to keep the set cohesive.
- Build a shot list that maps to the funnel
- PDP hero (clean, centered), lifestyle context (environment), scale with hand, detail macro, and social-first verticals.
- Choose props with intention
- Limit to 2–3 supporting items. Match materials and color temperature to the product’s vibe.
- Map your lighting
- Place product near the brightest side of the window. Use reflector to fill shadows. Avoid mixed color temperatures.
- Pre-test framing
- Shoot test frames to confirm room for cropping: 1:1 (PDP), 4:5 vertical (IG/ads), 16:9 (banners).
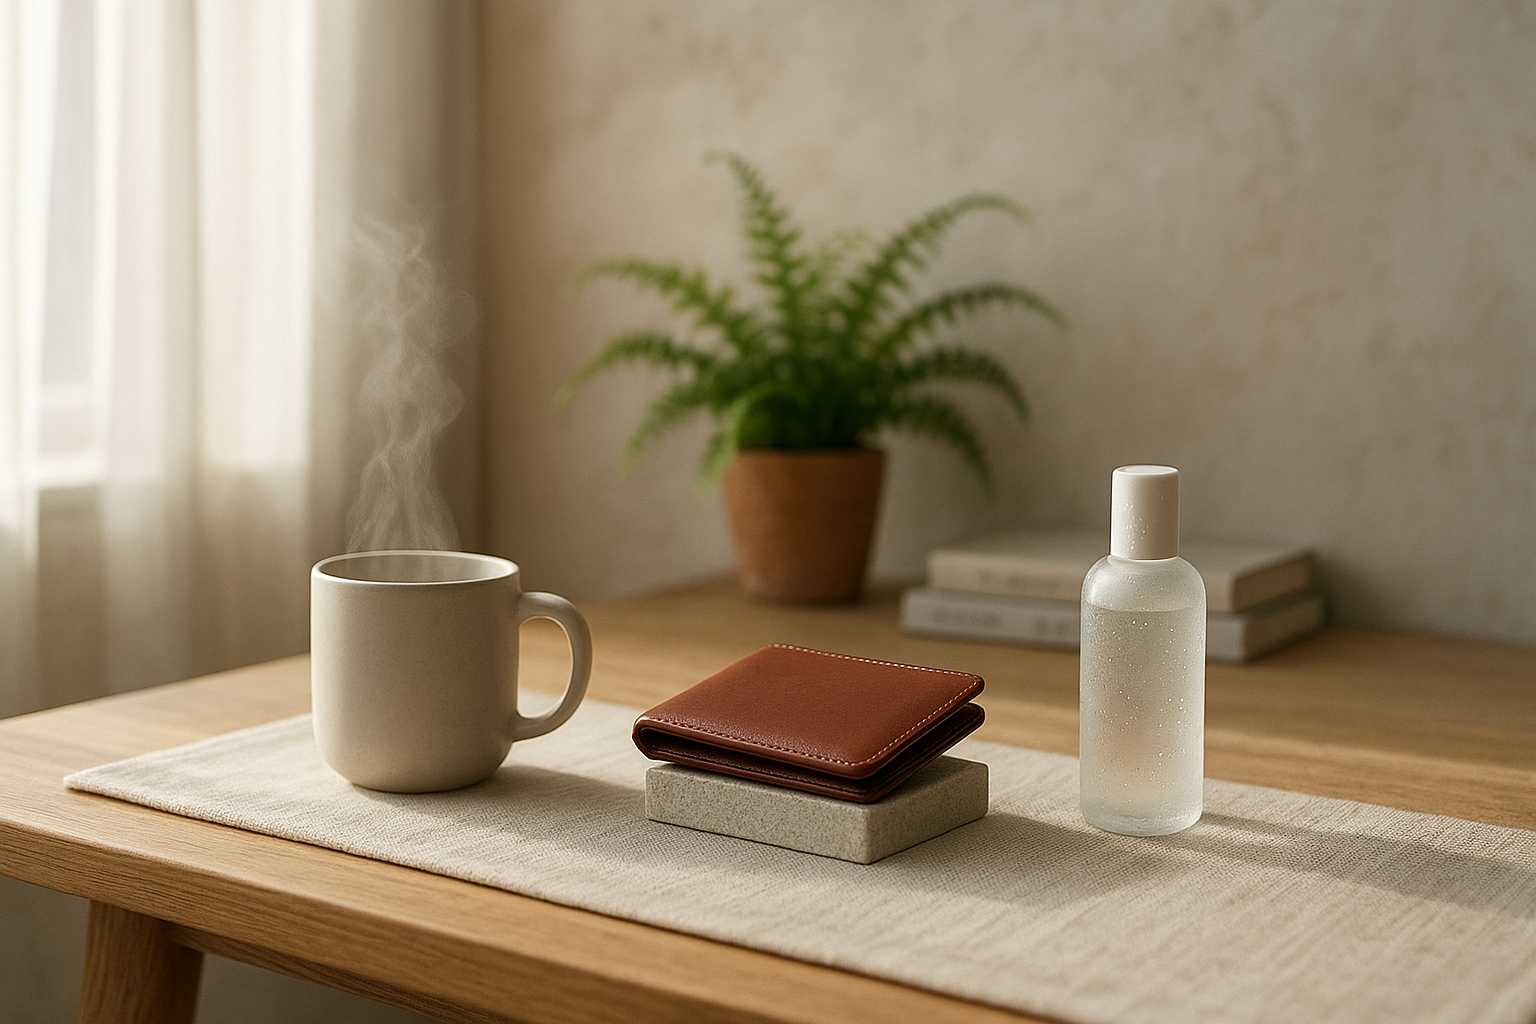
Composition cheat codes for Shopify
- Rule of thirds: Place the product or key feature on an intersection.
- Leading lines: Use table edges or props to point toward the product.
- Negative space: Keep breathable areas for text overlays or price stickers.
- Touch and scale: Include a hand, pocket, or common object to signal size.
- Micro details: Capture textures — stitching, gloss, pour, droplets — for perceived quality.
- Movement: A gentle steam plume, a pouring liquid, or a swatch being applied adds life.
Model or no model? Try-ons without a full crew
On-model imagery boosts trust for apparel, jewelry, eyewear, and accessories — but casting and studios are expensive. With Supra AI Photo Studio, you can create realistic try-ons in minutes: select a model (or generate one), apply your product, adjust pose, skin tone, or body type, and keep fabric details true-to-life.

Post-production that multiplies ROI (and speed)
Traditional editing is time-consuming. Here’s a fast, scalable workflow inside Supra AI Photo Studio:
- Auto enhance in one click
- Background remover and replacement
- Object placement for instant lifestyle scenes

- AI Try-On for fashion
- Upscale for crisp zooms
- UGC and B-roll videos for ads

Curious how it feels in action? Watch the quick demo: https://www.youtube.com/watch?v=M2ISy20la78
Example 20-minute workflow
- Shoot 6–10 frames near a window with reflector.
- Import to Supra AI Photo Studio.
- Run Auto Enhance and Background Remover on the best 4.
- Use Object Placement to produce 2 lifestyle variations (kitchen and office). Add a macro detail crop.
- Generate one AI Try-On if it’s apparel.
- Export a 4:5 vertical crop for ads and a 1:1 square for the PDP.
- Generate a 10–15s UGC clip for social proof.
https://supra-ai-photo-studio.sktch.io/images/help/editor-overview.webp
Shopify optimization checklist (don’t skip)
- Image sizes and ratios
- File weight
- Alt text and naming
- Consistency
- A/B testing
When to use AI vs. a reshoot
- Use AI for: background cleanup, color correction, quick lifestyle context, on-model try-ons, and ad variants.
- Reshoot when: the product changed, reflective/glossy surfaces need precise control, or you need complex hands-in-action shots with specific props.
Turn plain photos into high-converting visuals today
You don’t need a full studio to get results. Start with window light, a reflector, and a tight shot list — then scale your output with AI.
- Install Supra AI Photo Studio on Shopify: https://apps.shopify.com/supra-ai-photo-studio
- Explore the features and workflow: https://supra-ai-photo-studio.sktch.io/
With free and affordable plans, you can transform product photos, generate on-model try-ons, and create UGC/b-roll videos — all in minutes, right inside your Shopify admin.
Pro tip: Before using Object Placement or Try-On, isolate the product first. In Supra AI Photo Studio, use 'Isolate Product' to remove distractions so the AI focuses on the true shape and edges.