How to Export a Webflow Site with CMS Content for Independent Hosting
Introduction
Webflow provides designers and developers with a powerful platform to create visually stunning websites with ease. However, one limitation many users face is exporting their site — especially those with CMS content — for hosting on an independent platform. In this comprehensive guide, we’ll explore how you can use ExFlow to export your Webflow site, including CMS content, and host it independently, saving on costs and gaining flexibility.
Why Export Your Webflow Site?
Exporting your Webflow site allows you to:
- Reduce Costs: Avoid Webflow’s hosting fees by choosing a more affordable hosting provider.
- Gain Flexibility: Take control over your hosting environment, allowing for seamless integration with other platforms or tools.
- Ensure Customization: Make additional customizations that might not be possible within the Webflow environment.
Introducing ExFlow: Your Exporting Solution
ExFlow is a crucial tool for anyone looking to export their entire Webflow site, including CMS content, and take advantage of hosting flexibility. Unlike default Webflow exports, ExFlow provides options such as exporting all pages, including dynamic CMS pages, and supporting automatic synchronization with popular platforms like S3, Git, and FTP.
Step-by-Step Guide to Exporting Your Webflow Site
1. Getting Started with ExFlow
To begin with ExFlow, visit ExFlow's website and enter the domain name of your Webflow site. This simple step initiates the export process.
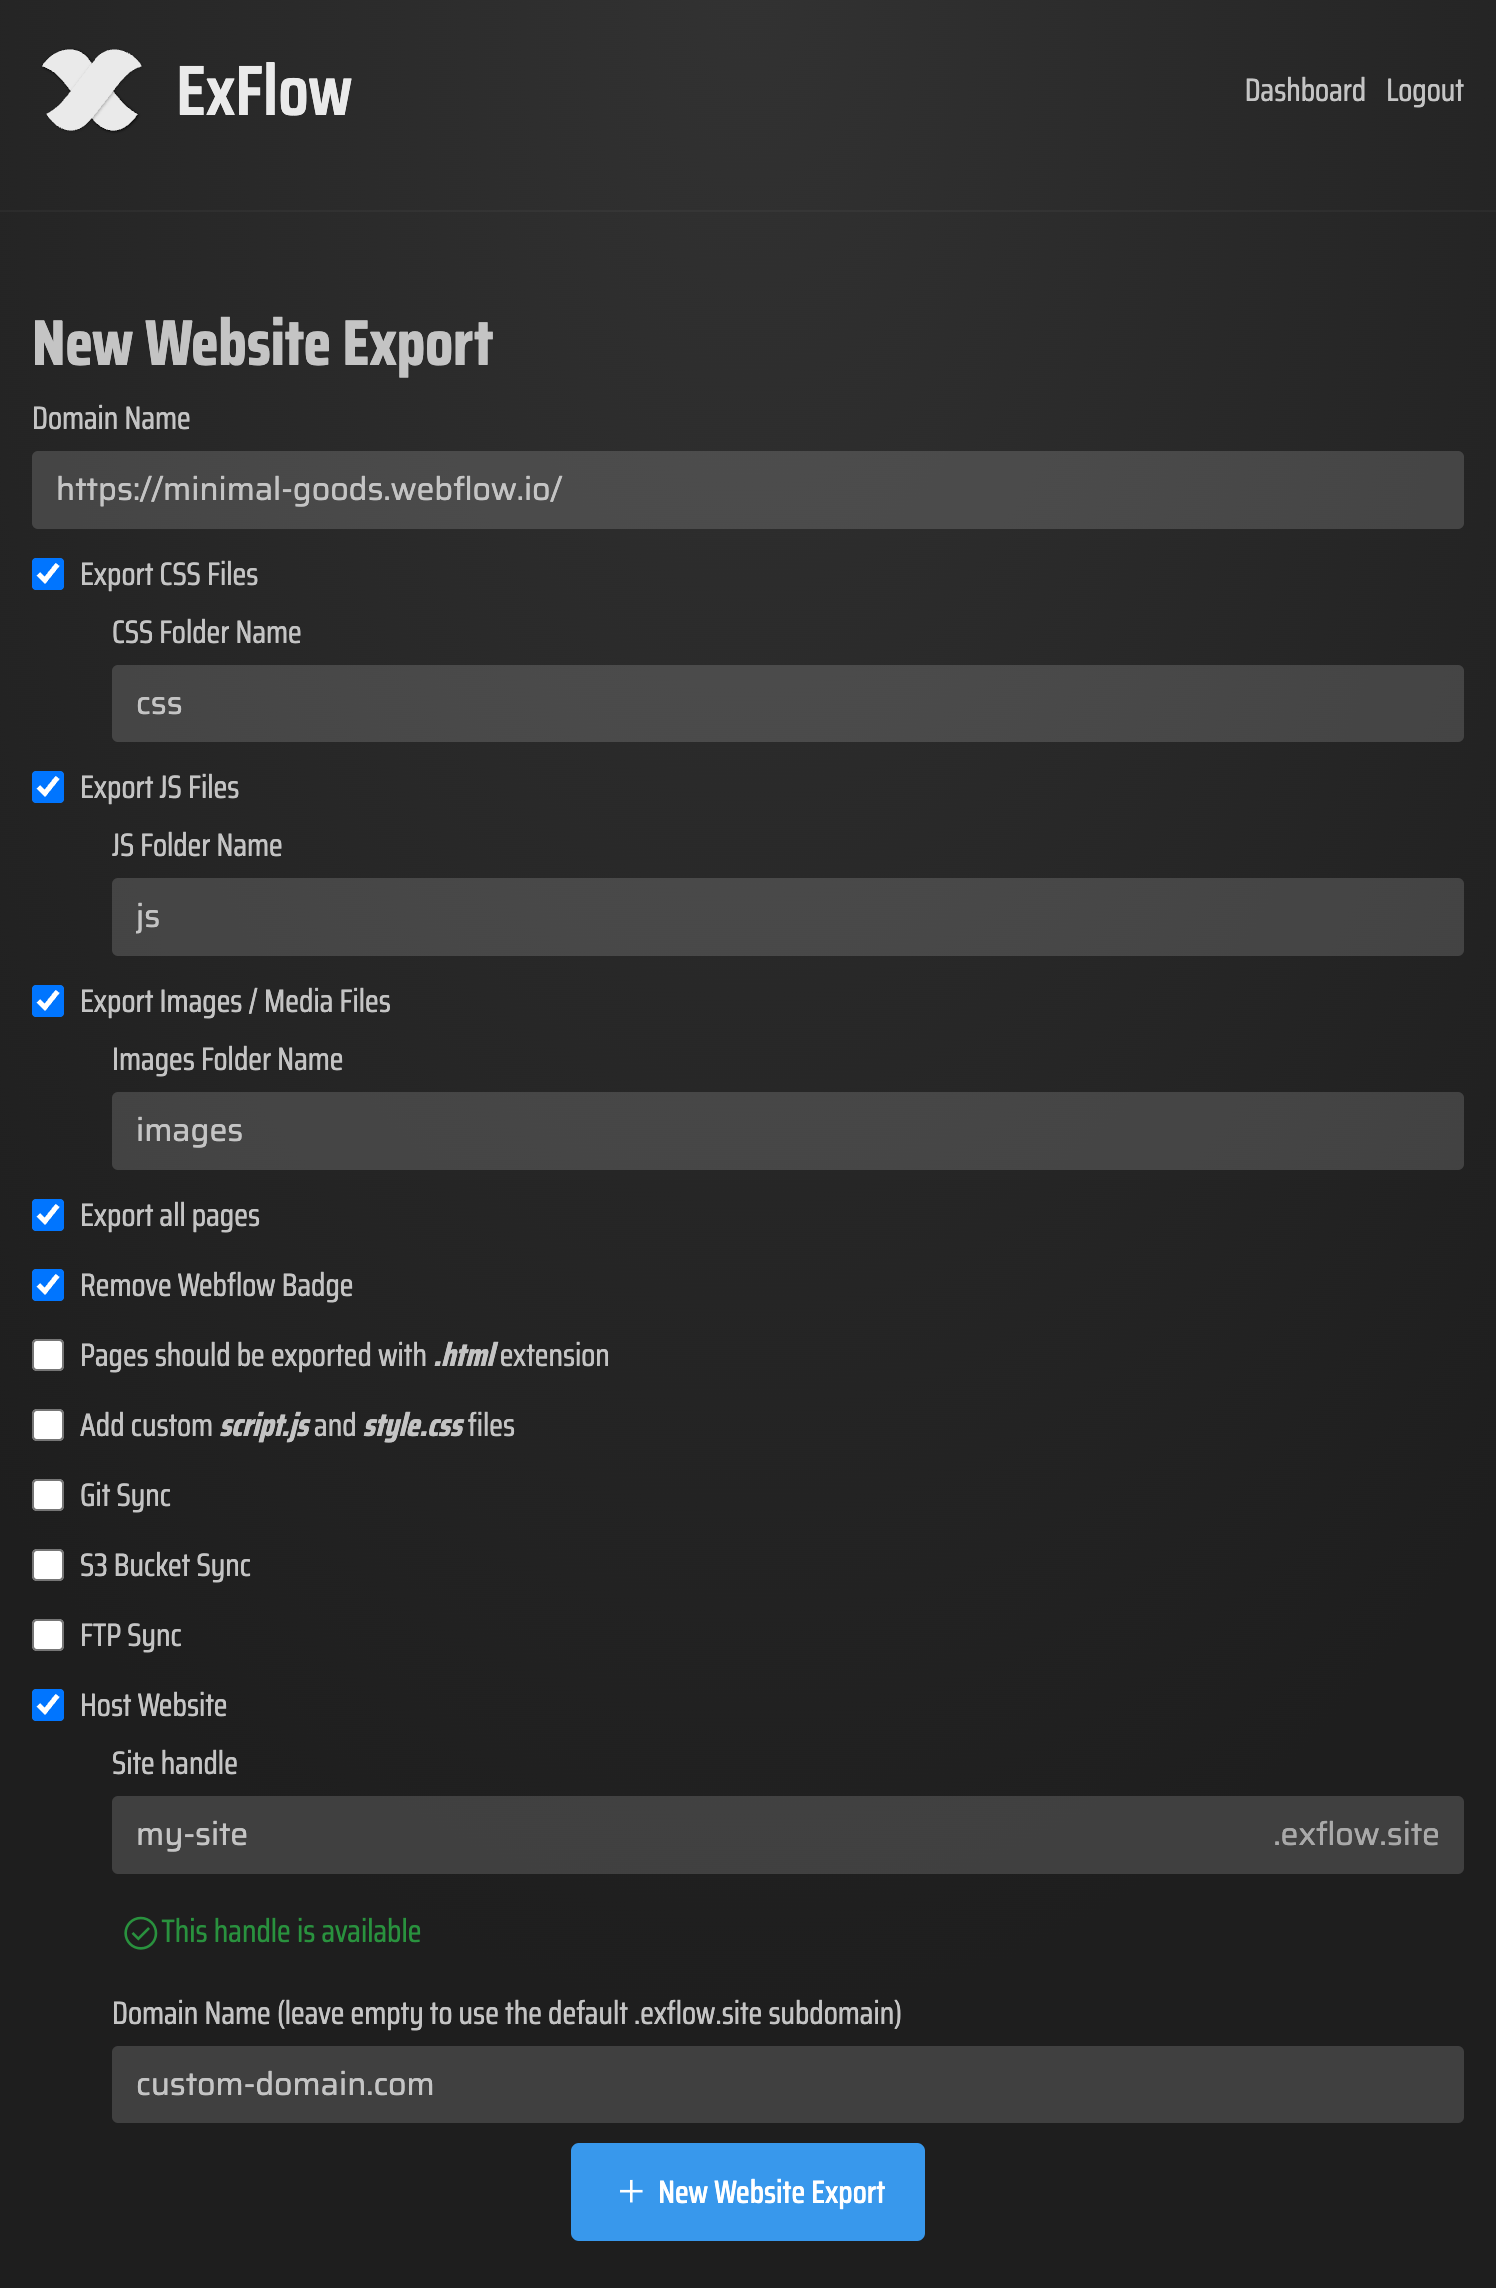
2. Customize Your Export
ExFlow provides a comprehensive suite of customization options:
- Choose to export CSS files, JS files, images, and other media assets.
- Remove Webflow’s brand badge for a clean and professional look.
- Add custom scripts or stylesheets, offering more control over your site's design and functionality.
- Configure automatic synchronization to S3, Git, or FTP to streamline your hosting workflow.
For more on customization, check ExFlow’s Export Guide.
3. Export All Pages
Unlike standard Webflow exports, ExFlow ensures all pages, including CMS content, are included. This feature addresses a significant limitation faced by many Webflow users.
4. Download or Sync Your Files
Once your export is configured, choose whether to download your site as a zip file for manual uploading or let ExFlow automatically sync the data to your preferred hosting solution.
Hosting Your Exported Webflow Site
Exporting your site is just step one. Here's how you can host it independently:

Option 1: ExFlow Hosting
Leverage ExFlow's hosting services for fast and easy deployment directly from the export process. It supports linking an external domain for a customized experience.
Option 2: Amazon S3
- Create an S3 Bucket: Log into AWS, create a bucket, and allow ExFlow to sync automatically.
- Enable Static Hosting: Set up your index.html and start serving static content.
Option 3: Git Hosting
Manage your site with Git to maintain effective version control:
- Connect your Git repository credentials, allowing ExFlow to sync and push directly to it.
- Use GitHub Pages or similar services for site deployment.
Option 4: FTP Hosting
- Provide FTP credentials in ExFlow for automatic uploads.
- Ensure your server is correctly configured to serve the hosted files.
Conclusion
Exporting a Webflow site filled with CMS content for independent hosting opens up a realm of possibilities in terms of cost savings, flexibility, and control over your project. ExFlow simplifies this process, offering a comprehensive toolset for seamless integration and deployment. Ready to embrace independence in your online projects? Visit ExFlow's official website to get started.
To see ExFlow in action, watch this instructional video:
Explore more options and inspire your website projects with countless possibilities! Whether you're managing an intricate CMS-based site or looking for simple static hosting, ExFlow has you covered, from export to execution.